Aluminum Anodizing: All You Need to Know
By JunWen Liu | May. 28, 2026
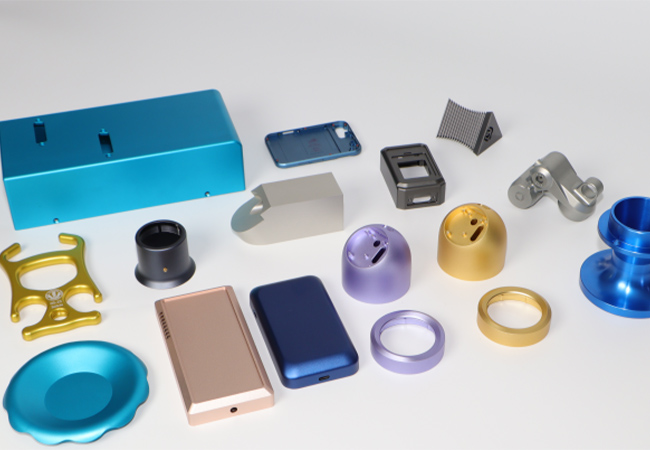
Suppose you have ordered a batch of CNC machined aluminum parts. When they arrive, the surface finish feels right, and the color matches your exact specifications. But six months later, your customer reports signs of corrosion on the housing—the “anodized” finish is already flaking away. This is the stark difference between a poorly executed surface treatment and anodizing done right.
For CNC machined parts, proper anodizing ensures long-lasting corrosion resistance, superior wear protection, and vibrant colors locked deeply within the material rather than just sitting on the surface. However, achieving these optimal results requires a clear understanding of color options, dimensional tolerance impacts, best implementation practices, and how anodizing compares to other surface finishes.
This comprehensive guide covers everything you need to know—including anodizing types, colors, tolerances, alloy compatibility, and critical RFQ details—to help you evaluate your technical needs and specify the process accurately on your next order to avoid costly mistakes.
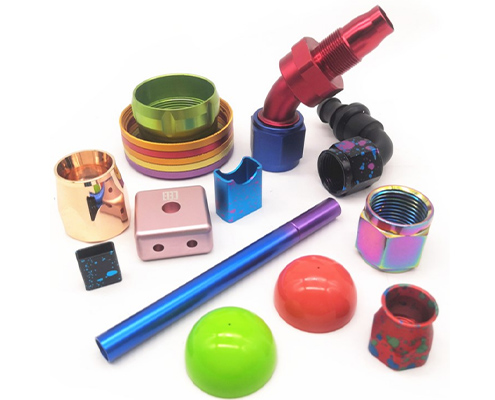
Anodizing is not a mere surface coating; it is an electrochemical conversion process that transforms the aluminum surface into aluminum oxide. Because this oxide layer is grown directly from the base metal rather than applied on top, it becomes integral to the part, eliminating any risk of peeling or delamination. Depending on the specific process type, anodizing delivers varying levels of protection: ranging from basic decorative corrosion resistance to specialized hard anodizing, which forms a high-hardness, wear-resistant barrier engineered to endure both daily handling and rigorous industrial applications.
Understanding the process helps you ask the right questions of your machining supplier.
The machined aluminum part is degreased and acid-etched to remove surface contaminants and create a uniform surface. If your part has machined oil residue, this step fails — and the anodizing fails with it.
The part is submerged in an acid electrolyte bath (typically sulfuric acid for Type II). A DC current passes through the part (the anode) to a cathode. Oxygen ions migrate to the aluminum surface and react to form Al₂O₃. The layer grows both inward (penetrating the base metal) and outward (building above the original surface).
If you want color, the part is immersed in a dye bath immediately after anodizing. The porous oxide structure absorbs the dye. After dyeing, the pores are sealed to lock the color in. Black is the most durable and repeatable color. Bright colors (red, blue, gold) are possible but demand tighter process control for batch-to-batch consistency.
The porous oxide layer is sealed by immersion in hot deionized water (standard) or nickel acetate solution (premium corrosion resistance). Sealing closes the pores, locking in dye and preventing absorption of contaminants. An unsealed anodized surface will stain, corrode, and fade.
Note: Type III hardcoat is often left unsealed when maximum wear resistance is required, as the sealing process can slightly soften the oxide layer.
Thickness measurement (eddy current), color check (spectrophotometer), and visual inspection. For your critical parts, request a thickness report and a color control sample with your shipment.
The U.S. military standard MIL-A-8625 (now MIL-PRF-8625) defines three distinct types of anodizing. Before diving into technical tolerances, it is important to understand what each type means and when to use it:
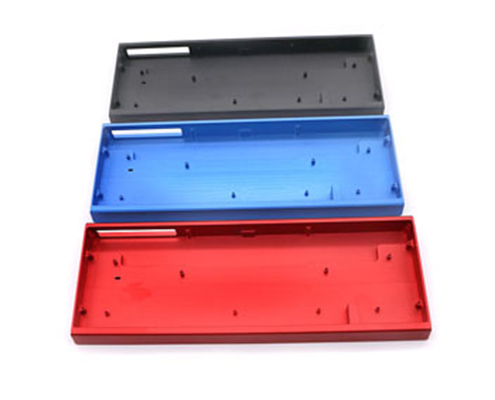
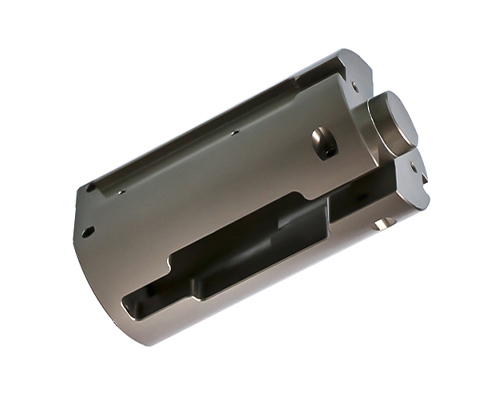
Here’s a clear table for how to choose:
| Feature | Type I (Chromic Acid) | Type II (Sulfuric Acid) | Type III (Hardcoat) |
| Thickness | 0.5–7.6 µm | 5–25 µm | 25–150 µm |
| Hardness | Low | Moderate (HV 300-400) | Hardness: High (HV 400-600) |
| Wear Resistance | Minimal | Good | Excellent |
| Corrosion Resistance | Good (sealed) | Excellent (sealed) | Excellent |
| Color Options | Clear / gray only | Full range (black, blue, red, gold, etc.) | Muted dark tones only (natural gray-black, olive) |
| Dimensional Impact | Negligible | ~50% outward growth / ~50% inward | Significant — must pre-compensate |
| Fatigue Life Impact | Minimal | Low to moderate | Can reduce fatigue life |
| Best For | Aerospace tight-tolerance fatigue-critical parts | Consumer-facing CNC parts, enclosures, knobs | High-wear industrial parts, sliding surfaces, firearm components |
| Typical Cost | $$$ | $ (most common) | $$ |
Your rule of thumb:
Class 1 vs Class 2 — The Color Distinction
“Class” refers purely to color — not quality, not thickness.
To evaluate whether anodizing is the right choice for your project, it is helpful to look at its core advantages and limitations:
Because different anodizing types yield different properties, components across various industries leverage this finish in distinct ways:
If you decide to proceed with anodizing for the CNC parts, you should account for material behavior, dimensional changes, and cosmetic limitations during the design phase.
Not all aluminum anodizes equally. If you’re selecting a material for the next CNC part, here’s the ranking.
| Alloy Series | Anodizing Quality | Color Consistency | Best For |
| 6061-T6 | ★★★★★ | ★★★★★ | The default. Consistent color, excellent Type II & III results. |
| 6063-T5 | ★★★★★ | ★★★★★ | Extruded profiles. Slightly better cosmetic finish than 6061. |
| 5052 | ★★★★ | ★★★★ | Marine-grade. Good anodizing, slightly warmer natural tone. |
| 7075-T6 | ★★★★ | ★★★ | High strength. Anodizes darker. Hardcoat works well but color matching is harder. |
| 2024 | ★★ | ★★ | High copper content produces a yellow, uneven anodic layer. Avoid for cosmetic parts. Also difficult for Type III hardcoating due to the risk of burning. |
| Cast Aluminum (ADC12) | ★★ | ★ | High silicon content causes dark patches and uneven coating. Anodize only if functional protection matters more than looks. |
Anodizing changes dimensions. If you ignore this, the press-fit becomes a slip-fit, and the threaded holes don’t thread.
The ~50% Rule
About 50% of the coating thickness penetrates inward (consuming some of the base metal), and 50% builds outward (adding to the original surface). The net outward growth is approximately half the total coating thickness.
| Coating Thickness | Net Outward Growth (per surface) | Total Diameter Change |
| Type II, 10 µm | ~5 µm | +10 µm on a shaft / -10 µm on a bore |
| Type II, 25 µm | ~12.5 µm | +25 µm on a shaft / -25 µm on a bore |
| Type III, 50 µm | ~25 µm | +50 µm on a shaft / -50 µm on a bore |
| Type III, 100 µm | ~50 µm | +100 µm on a shaft / -100 µm on a bore |
What This Means for Drawings
Here’s what anodizing can (and can’t) deliver for your reference.
| Color | Repeatability | Notes |
| Clear / Natural | Excellent | No dye, no variation. Safest choice for functional parts. |
| Black | Very Good | Most consistent dyed color. The default for professional equipment. |
| Dark Blue / Navy | Good | Reliable on 6061. May shift on 7075. |
| Red | Moderate | Not as deep as black; expect batch-to-batch ΔE ≤2. |
| Gold | Moderate | Alloy-dependent; 5052 gives truer gold than 6061. |
| Green / Purple / Orange | Fair | Specialty dyes. Lower repeatability. Always approve a sample. |
| Bright White | Not Possible | Anodizing cannot produce a true white — use powder coating instead. |
| Pantone Exact Match | Not Guaranteed | Anodizing is process-dependent, not formula-dependent. You can get close (ΔE ≤1.5 in controlled production), but don’t expect paint-like precision. |
The 6061 vs. 7075 Anodizing Color Reality
Material selection directly dictates the final cosmetic outcome when an assembly comprises components machined from different aluminum alloys:
Anodizing is not always the optimal solution for every component. Here is how it stacks up against alternative industrial finishes:
| Feature | Anodizing (Type II) | Powder Coating | Electroless Nickel Plating |
| Mechanism | Electrochemical conversion | Electrostatic powder + bake | Chemical alloy deposition |
| Thickness | 5–25 µm | 50–200 µm | 5–25 µm |
| Dimensional Precision | Excellent | Poor (thick, uneven edges) | High (uniform deposition) |
| Hardness | HV 300-400 | Varies (relatively soft) | HV 500-700 (high) |
| Color Range | Limited (no bright white) | Unlimited | Metallic silver/gold only |
| Delamination Risk | None (integral to metal) | Yes (can chip/peel) | Low (strong chemical bond) |
| Electrical Conductivity | Insulator | Insulator | Highly Conductive |
| Best Used For | Precision CNC parts, cosmetics | Heavy frames, enclosures | EMI shielding, steel parts |
To avoid costly miscommunications with overseas suppliers, explicitly include these 10 items on every RFQ and drawing package:
The Problem: Color Consistency Across a 3-Part Assembly
A European audio equipment brand approached VMT in 2024 with a problem. Their product — a desktop headphone amplifier — used three separate CNC-machined aluminum parts that had to match visually: a front panel, a volume knob, and a rear connector plate. All three were machined from 6061-T6, then anodized in matte black (Type II, Class 2).
Their previous supplier delivered parts where the knob was noticeably darker than the panel. Different shades of black, side by side. The brand was losing customer trust — users assumed the mismatch meant a lower-tier product.
The Root Cause
Three parts, three different machining batches, three anodizing runs by the previous supplier. The dye bath chemistry drifted between runs because the bath wasn’t monitored between batches. No control sample was kept. No color measurement was done. Quality control was “someone looked at it.”
VMT’s Solution
VMT consolidated the approach into a single controlled process:
The Results
Anodizing is the premier choice for aluminum finishing, but flawless quality is never an accident. It demands precise technical specifications, rigorous process control, and objective instrument-based inspection rather than mere visual assessment.
Take the notorious issue of color mismatch. It looks like a finishing error, but it’s actually a material and workflow management problem. The only real solution is batch-level control: the same alloy, the same machining prep, the same dye bath, and the same cycle time. It must be measured with instruments and approved against a physical standard. If your supplier can’t explain how they control these steps, they aren’t controlling your color.
At VMT, we integrate precision machining and anodizing within a single, unified ecosystem. No hand-offs. No “the anodizer messed up” conversations. One single supplier taking 100% accountability for your end product.
[Upload your drawing → Get a quote with anodizing spec review within 24 hours.]
 WhatsApp/WeChat/Mobile:
+86-15099911516
WhatsApp/WeChat/Mobile:
+86-15099911516 Tel: 86-150-9991-1516
 QQ: 939020977
 E-Mail: service@vimetal.com.cn


How thick is an anodized coating?
Type II (sulfuric acid) is typically 5–25 µm. Type III (hardcoat) is 25–150 µm. You specify the thickness range in your RFQ — don’t accept “standard thickness” as an answer. The thickness directly affects wear life, corrosion resistance, and dimensional fit.
Does anodizing change part dimensions?
Yes. About 50% of the coating thickness builds outward from the original surface. A 20 µm Type II coating adds roughly 10 µm per surface. For bores, this reduces the internal diameter by ~20 µm total. Write “dimensions apply after anodizing” on your drawing.
Can I get any color I want?
No. Anodizing dyes are translucent — they color the oxide layer, not the metal surface. Bright white is impossible. Pantone-exact matching is unreliable. Black and dark blue are the most repeatable. For any color, approve a physical sample before production.
Does anodizing affect part strength?
Anodizing does not change the bulk strength of the aluminum. However, Type III hardcoat can reduce the fatigue life of cyclically loaded parts because the hard oxide layer is brittle relative to the ductile aluminum underneath. For fatigue-critical aerospace parts, Type I (chromic acid) is preferred.
Can anodized aluminum be electrically conductive?
No. Aluminum oxide is an electrical insulator. If your part needs a grounding point, specify it as a “masked area” on your drawing. For parts that require full-surface conductivity, consider electroless nickel plating instead.
What’s the lead time for anodizing?
In a vertically integrated shop like VMT (machining + anodizing under one roof), anodizing adds 1–3 days to your machining lead time. If your supplier outsources anodizing to a third party, add 3–7 days plus shipping and coordination risk. Ask whether your supplier does anodizing in-house or subcontracts it — the difference shows in both lead time and quality accountability.

 How to Evaluate Custom Bushing Manufacturers: A Procurement Guide