Compare CNC Prototyping Cost and Application: Is This Way Suitable for Your Project?
By JunWen Liu | Aug. 01, 2026
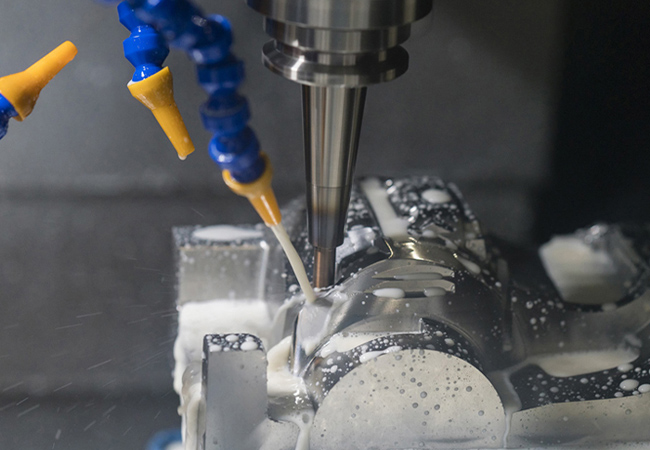
For your newly designed products, whether they are for electronics, drones, robotics, automotive, or aerospace, the first step is to go through prototyping for samples or low-volume production by rapid machining or other processing methods. Among these, the most vital for prototyping is CNC machining—or CNC prototyping.
Controlled by CAM (which transforms CAD designs into G-code that CNC machines can recognize), this method uses precise cutting or drilling of a bulk of metal or plastic to bring you precision, speed, and budget advantages! Now read further to better learn the production cost and which kind of project is suitable for rapid cnc prototyping.
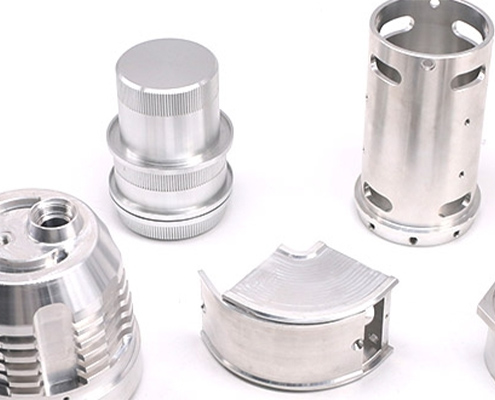
The big unique benefits for whatever CNC metal prototyping or CNC plastic prototyping are contributed by on-demand CNC manufacturing. From the intro, you briefly learned how CNC machining runs, and the following is what you can further grasp regarding the actual situations (or usage conditions) for best-fit CNC prototyping projects:
High-Strength Functional Testing
Structural components and load-bearing parts are especially suitable for keeping metal prototyping products aligned with their original metal microstructure integrity, as the subtractive manufacturing of CNC machining only removes material rather than changing the metal’s inner structure or composition.
Production-Grade Materials
This CNC prototyping works well with a wide range of materials, including aluminum (6061, 7075, 6063, 5052), brass (230, 260, 443), stainless steel (304, 316, 430), titanium (grade 2, grade 5), carbon steel, alloy steel, or plastics (POM, ABS).
Tight Tolerances
Projects requiring micron-level accuracy often involve tight tolerances (±0.005 mm to 0.01 mm) for metal CNC prototyping, and still good tolerances of 0.05 mm for plastic CNC prototyping (because plastics are not as rigid as metal).
Visual & Surface Quality
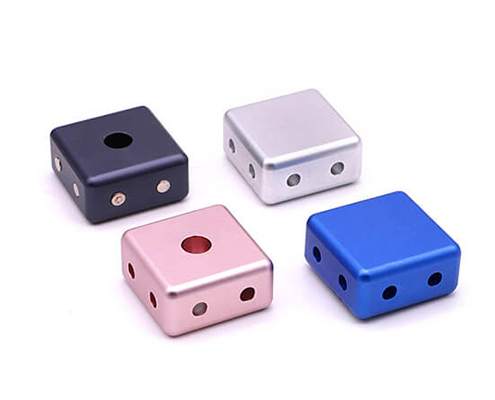
Projects requiring good surface smoothness (by CNC surface finishing) or special surface treatments after machining (anodizing, bead blasting, powder coating, plating, or more).
Although many demands can be met by CNC prototyping, you may not totally rely on CNC machining for all projects. You should consider alternatives when you want:
However, how to define “ultra-intricate internal geometries” or “visual proof-of-concept” should depend on your detailed drawings, and it is better to consult professional engineering teams.
| Manufacturing Method | Key Advantages | Best Project Use Case |
| CNC Prototyping | High precision (±0.005 mm), real metal strength, excellent surface finish | Functional metal/plastic testing, load-bearing parts, pre-production samples |
| 3D Printing (Additive) | Low initial setup cost, handles ultra-complex internal geometries | Early-stage visual proof-of-concept models on a tight budget |
| Rapid Tooling | Low unit price at scale, consistent molded material properties | Low-to-medium production runs (100–1,000+ identical units) |
The most basic cost for CNC prototype machining is obviously the raw material cost plus the CNC machine’s running time, while hidden costs of setup time, CAM programming, tight tolerances, and surface treatments are non-negligible.
The basic formula is:
Total Cost = Material Base + (Machining Time x Hourly Rate) + Setup Fee + Surface Finishing
| Cost Factor | Estimated Price Range (USD) | Key Price Drivers |
| Raw Material | $20 – $200 per unit | Material alloy grade (e.g. Aluminum vs. Titanium) and block size |
| CAM & Setup | $50 – $300 (One-time) | Part design complexity, programming, and fixture preparation |
| Machining Time | $40 – $150 / hour | Machine type (3-axis vs. complex 5-axis machining) |
| Surface Finishing | $20 – $150 per batch | Post-processing treatments (Anodizing, bead blasting, plating) |
Note: You should know that the above table is just for reference, as prototyping part shapes, surface requirements, material grades, and tolerances can be different for every new custom product. Before signing and paying, you would be better off clarifying every detailed fee with your partner CNC machining factory.
Actually, this design tip is a must because CNC machining cutting tools find it hard to cut perfect 90-degree internal corners. In addition, radii are not only for faster CNC machining (time means cost), but they are also good for your design as they are not prone to crack from cutting or drilling stress.
It’s understandable to keep tight tolerances for critical mating surfaces or threaded holes because they relate to assembly or sealing issues. But for many structural parts or large-area surfaces, it’s not necessary to ask for tolerances like ±0.005 mm, which is a budget waste.
Small batches of rapid CNC prototyping are the best for cost because CNC prototyping requires CAM fees; ordering 5-10 pieces helps amortize these costs compared to a single piece.
Commonly used materials like 6061 aluminum or 304 stainless steel are definitely cheaper due to their competitive supply prices, and they are also relatively easy-to-machine, keeping total production fees competitive.
Avoid designing extremely deep internal pockets or narrow slots. A good rule of thumb is to keep the pocket depth within 3 to 4 times the tool diameter. And this is primarily because deep cavities require extra-long cutting tools, which are prone to chatter, tool vibration, and tool breakage( affect total machining time and machine hourly rates).
Better to limit thread depths to 2 to 3 times the hole diameter. Non-standard hole diameters require custom reamers or specialized milling paths, adding extra tool changeover time. Additionally, tapping threads deeper than 3 times the diameter doesn’t add structural strength, but increases the risk of tap breakage and scrap rates.
Try to align as many features (holes, pockets, slots) as possible on a single orientation or face of the part. Every time a CNC operator has to manually flip, re-align, and re-clamp a workpiece to machine features on another face, it adds extra labor and fixture setup costs. Designing parts that can be machined in a single setup (or fewer axis rotations) keeps labor costs to a minimum.
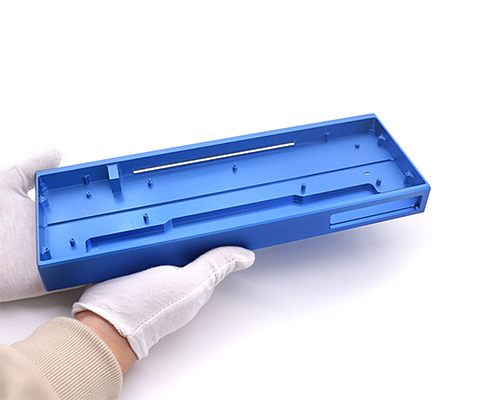
A European mechanical keyboard brand approached VMT with a custom 65% layout aluminum keyboard housing design for their upcoming high-end product line. The initial CAD model contained two major cost drivers that caused the prototyping estimate to exceed their target budget by nearly 50%:
Our DFM Optimization Solution:
Result: The overall machining time per housing dropped by 30%, and the client saved nearly 40% on total project costs while achieving perfect keycap alignment and a high-end anodized surface finish.
From this article, you may have learned the basics of CNC prototyping, best-fit use conditions, how cost is calculated, and cost-saving tips. The key points are to check for exceptional hidden fees, design your parts with radii and non-critical tolerances, and optimize your batch sizes and materials. Still confused about whether CNC prototyping is good for your project, or need other custom rapid prototyping services? Unsure of the material selection, tolerance, shapes, or surface treatment for CNC prototyping? Welcome to send us your drawings or upload CAD files today for a free DFM review and competitive quote.[2D Drawings (PDF files), 3D Drawings (IGS/STP/STEP files)]
 WhatsApp/WeChat/Mobile:
+86-15099911516
WhatsApp/WeChat/Mobile:
+86-15099911516 Tel: 86-150-9991-1516
 QQ: 939020977
 E-Mail: service@vimetal.com.cn


How much does CNC prototyping cost?
Costs vary based on geometry and material, but most custom small-to-medium metal or plastic prototypes range between $100 and $600 per part, including initial setup.
Is CNC machining right for my prototype?
It is right if you need functional structural strength, high precision (±0.01 mm or tighter), or specific metal/plastic material properties (such as Aluminum 6061 or Stainless Steel 304).
What is the cost difference between CNC prototyping and 3D printing?
3D printing is cheaper for initial visual concept models without high strength requirements. However, CNC prototyping is more cost-effective for functional, production-ready metal parts and small-batch runs.
What is the cost difference between 3-axis and 5-axis CNC prototyping?
5-axis machining has a higher hourly rate ($60–$150/hr vs. $40–$80/hr for 3-axis), but it can lower total costs on highly complex parts by reducing multiple manual machine setups.
How can I reduce my CNC prototype cost?
You can lower costs by designing standard internal radii, relaxing non-critical tolerances, choosing easy-to-machine stock materials like Aluminum 6061, and ordering small batches (5–10 units) to split setup fees.
What materials can be used for CNC prototyping?
A vast range of metals including Aluminum (6061, 7075, 5052), Stainless Steel (304, 316), Brass, Titanium, Carbon Steel, and engineering plastics like POM (Delrin), ABS, Nylon, and PEEK.
 Written By JunWen Liu
JunWen Liu holds a Mechanical Engineering degree from Esslingen University of Applied Sciences and spent seven years as a CNC Process Engineer, accumulating extensive hands-on experience. She now shares that knowledge through her writing, drawing from real problems she encountered on actual projects. Outside of work, she enjoys hiking and is always chasing the next summit view.

 Titanium vs Stainless Steel: Which is Suitable for Your Project?