CNC Prototyping Cost Guide: How to Estimate, Breakdown, and Reduce Your Budget
By JunWen Liu | Sept. 07, 2026
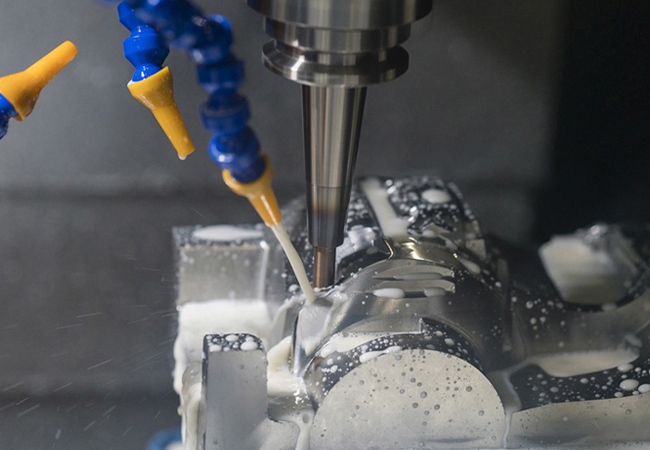

Have you ever submitted drawing files to a CNC shop for prototype quotes, only to be caught off guard by a steep price tag? The truth is, machine shops usually aren’t overcharging you at random, even though those high costs can often be trimmed down through proper optimization.
By understanding how CNC prototype machining cost are structured, calculated, and what drives them up, you can build reliable budget estimates for your team and avoid paying a premium. Knowing performance-neutral DFM (Design for Manufacturability) cost-reduction tactics also helps you judge if your machining vendor’s engineering team really knows their stuff—or allows you to refine your own CAD models directly. This guide covers those foundational principles and engineering tricks.
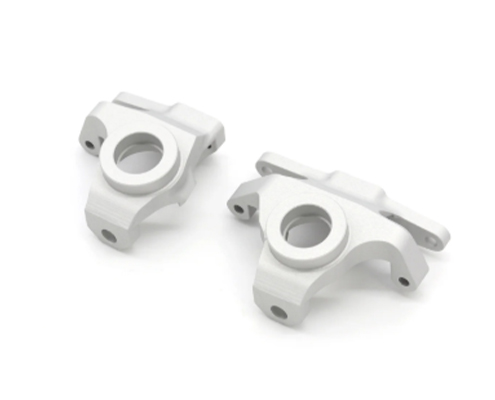
At the end of the post, we’ll walk through a real-world case study showing how our shop provided DFM feedback on an automotive client’s aluminum steering knuckle, cutting machining costs by 23%.
CNC rapid prototyping is a widely used method for building prototype parts. As a subtractive manufacturing process, it relies on computer-programmed cutting tools of various shapes and sizes to mill, drill, and shear away unwanted material until the desired component shape is achieved. Crucially, this process does not alter the underlying physical or chemical structure of the raw material.
Because the parent material properties remain intact, CNC prototyping is the preferred choice for functional or working prototypes. When your prototype must undergo mechanical testing, such as evaluating tensile strength, impact resistance, fatigue limits, airtightness, assembly fit, or kinematic smoothness under load, CNC machining is typically the right fit. In these scenarios, breaking down the cost structure is essential.
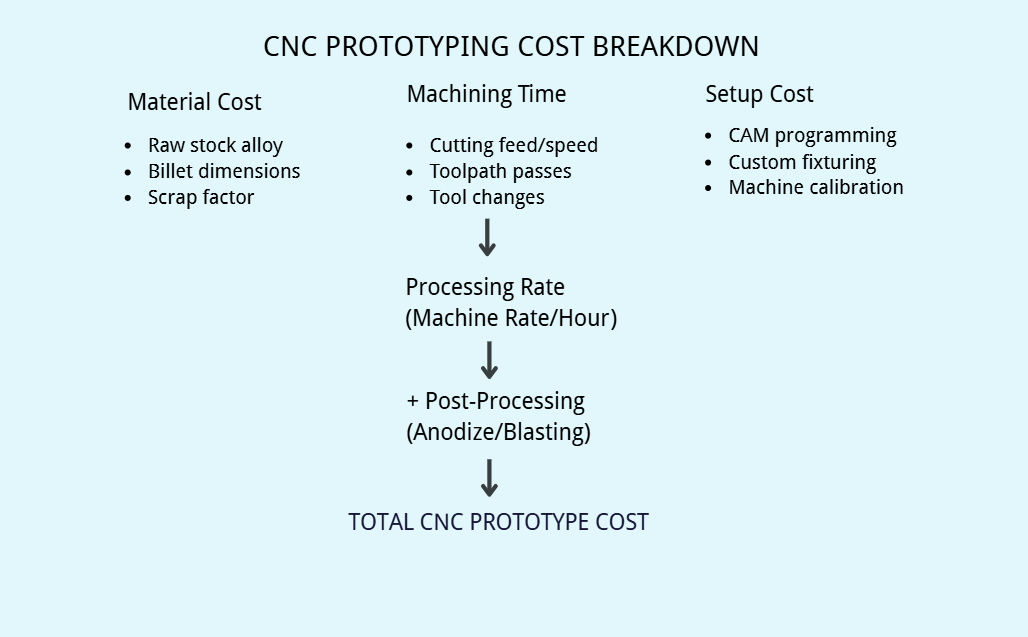
Total Cost = Material Cost + (Machining Time x Hourly Rate) + Setup Cost + Finishing Fee
When machining parts of identical geometry, material selection plays a massive role in determining your final prototype budget. Material impact is twofold: the upfront cost of raw stock, and the material’s machinability index, which dictates spindle speeds, feed rates, and cutting tool wear.
Below are comparative benchmark tables for metals (indexed to Aluminum 6061 = 1.0) and engineering plastics (indexed to POM/Acetal = 1.0) based on machining simple, identical prototype components.
| Metal Material | Raw Material Cost Index | CNC Machining Cost Index | Total Relative Prototype Cost Index |
| Aluminum 6061-T6 | 1.0 (Baseline) | 1.0 (Baseline) | 1.0 (Baseline) |
| Aluminum 7075-T6 | 1.8 – 2.2 | 1.1 – 1.2 | 1.3 – 1.5 |
| C360 Brass | 2.5 – 3.0 | 0.7 – 0.8 | 1.2 – 1.4 |
| C464 Naval Brass | 2.8 – 3.3 | 1.1 – 1.3 | 1.6 – 1.9 |
| 1018 Carbon Steel | 0.7 – 0.9 | 1.4 – 1.6 | 1.2 – 1.4 |
| 1045 Carbon Steel | 0.8 – 1.0 | 1.6 – 1.8 | 1.4 – 1.6 |
| 304 Stainless Steel | 2.0 – 2.5 | 2.2 – 2.5 | 2.2 – 2.5 |
| 316 Stainless Steel | 2.5 – 3.0 | 2.5 – 2.8 | 2.5 – 2.9 |
| Titanium Ti-6Al-4V (Grade 5) | 8.0 – 12.0 | 3.5 – 4.5 | 5.0 – 7.0 |
| Material | Raw Material Cost Index | CNC Machining Cost Index | Total Relative Prototype Cost Index |
| POM (Acetal / Delrin) | 1.0 (Baseline) | 1.0 (Baseline) | 1.0 (Baseline) |
| ABS | 0.7 – 0.8 | 0.9 – 1.0 | 0.8 – 0.9 |
| Nylon / PA6 / PA66 | 1.1 – 1.3 | 1.1 – 1.3 | 1.1 – 1.3 |
| PTFE (Teflon) | 3.0 – 4.0 | 1.4 – 1.6 | 2.0 – 2.4 |
| PEEK | 25.0 – 35.0 | 1.8 – 2.2 | 10.0 – 15.0 |
When the prototype’s primary purpose is early-stage fit checks, form evaluation, or low-load testing, switching to a more machinable material grade can cut part costs significantly without compromising early testing validity, and here are two typical examples:
If lightweight properties aren’t critical for structural validation in early engineering phases, moving from titanium to stainless steel reduces high raw material markups while maintaining high structural strength.
PEEK raw stock can cost up to 30 times more than POM. Unless your prototype operates above 150°C or in severe chemical environments, POM provides superior dimensional stability during machining at a fraction of the cost.
Deep pockets, thin walls, and sharp internal corners significantly increase cnc prototype machining cost. Machining these complex features requires higher operator expertise, specialized tooling, and additional machine hours, all of which drive up manufacturing fees.
If modifying these features will not affect your part’s final function or fit, applying the following DFM adjustments will reduce costs:
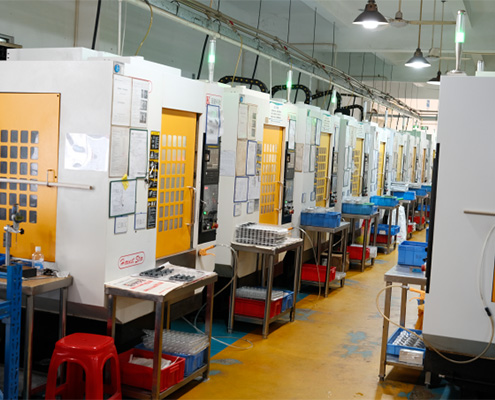
Order quantity is one of the levers driving per-unit CNC costs. Because fixture setups, CAM programming, and machine configuration are fixed expenses, ordering a single prototype forces that entire upfront setup fee onto one part. As batch sizes scale, these fixed engineering costs dilute rapidly across the total unit count.
The benchmark table below illustrates how unit costs drop for a typical medium-complexity aluminum 6061 prototype part as quantity increases:
| Batch Size | Est. Unit Cost (Aluminum 6061) | Key Cost Drivers |
| 1 pc (Single Prototype) | $150 – $250 | Fixed Setup & CAM programming fees account for the majority of the price. |
| 5 – 10 pcs | $45 – $80 | Fixed setup costs are diluted across multiple parts, causing a steep drop in unit price. |
| 50 – 100 pcs | $25 – $40 | Transitions to low-volume production. Material costs and cycle times become the main cost drivers. |
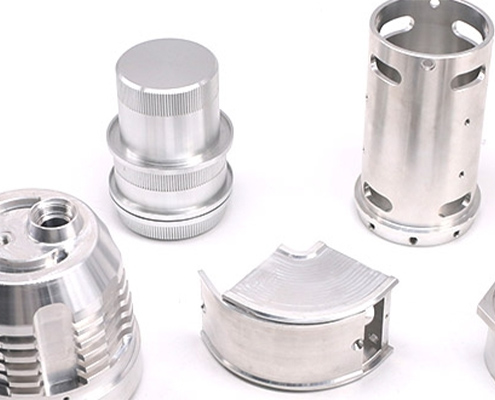
Although you may sometimes feel that an order of 1–5 prototype samples is enough, please consider the following:
For visual models, non-functional testing, or structural testing prototypes, an order of 1–5 prototype samples is generally enough.
However, for testing details of design changes, such as hole patterns or bracket thickness; as well as functional testing or engineering validation testing, it is best to order a slightly larger quantity (10–50 pieces).
In this way, it not only reduces the unit cost for your project, but also prevents the problem of a sudden shortage of prototype test samples, which leads to placing another small batch order and incurring increased costs.
Tolerances and surface finishes directly impact both machining time and quality control requirements. Unnecessary precision or cosmetic polishing on non-critical features will inflate your CNC prototype cost. The table below outlines the estimated cost increases associated with tighter tolerances, finer surface finishes, and common secondary post-processing services for your CNC prototype parts:
| Feature | Specification Level | Est. Cost Increase (vs. Baseline) | Impact on Production |
| Machining Tolerances | ISO 2768-m (Standard) | 0% (Baseline) | Standard feeds and speeds; standard inspection. |
| +/- 0.05 mm | +15% – 30% | Requires fine passes and standard digital caliper/micrometer checks. | |
| +/- 0.01 mm | +50% – 100%+ | Requires slow cutting feeds, sharp/specialized tooling, and CMM inspection. | |
| Surface Finish (Roughness) | As-Machined (Ra 3.2 um) | 0% (Baseline) | Direct off-the-mill finish; tool marks remain visible. |
| Smooth Machined (Ra 1.6 um) | +10% – 20% | Requires extra light finishing passes with fine cutters. | |
| Hand Polished (Ra 0.4 um) | +30% – 60% | Requires manual deburring and progressive hand sanding. | |
| Mirror Polish (Ra < 0.1 um) | +80% – 150%+ | Extensive manual labor and multi-stage polishing compounds. | |
| Surface finishes | Bead Blasting | +$5 – $15 / part | Media blasting to create a uniform matte finish and hide tool marks. |
| Type II Anodizing (Color/Clear) | +$15 – $35 / batch or part | Chemical bath for surface hardness and corrosion resistance. | |
| Type III Hard Anodizing | +$30 – $60 / batch or part | Thicker oxide layer for extreme wear resistance. | |
| Powder Coating / Painting | +$20 – $50 / part | Surface prep, masking of precision threads/holes, and spray application. | |
| Electroplating (Nickel/Chrome) | +$35 – $80+ / part | Multi-step chemical pre-treatment and electro-deposition layer. |
An automotive client approached us to produce an aluminum 6061 prototype of a steering knuckle for an upcoming vehicle validation test. The client’s initial CAD design featured deep internal lightening pockets, non-standard 90° internal corner radii, and ultra-tight tolerances of ±0.01 mm specified across all mounting surfaces. Under the original design specifications, the part required a complex 5-axis setup, specialized long-reach cutting tools, and extended machining cycles, pushing the estimated cost per prototype well beyond the client’s initial budget.
During our Design for Manufacturability (DFM) review, our engineering team identified several key areas where minor design tweaks could drastically reduce cycle time without compromising the part’s structural integrity or mounting function. First, we recommended increasing the internal pocket corner radii from sharp 90° angles to 3.5 mm, allowing standard 6 mm end mills to cut the cavities in a single high-speed pass. Second, we advised reducing the pocket depth-to-width ratio from 6:1 down to 3:1, eliminating tool deflection and chatter. Finally, we suggested relaxing tolerances on non-mating outer clearance zones to ISO 2768-m, while preserving ±0.01 mm strictly for critical bearing and tie-rod pin bores.
After the client approved the proposed DFM modifications, our CAM engineers reprogrammed the machining strategy. By shallowing the deep cavities and enlarging corner radii, we were able to transition the primary roughing operations to aggressive high-feed milling strategies on standard 3-axis CNC machines, reserving 5-axis indexing purely for multi-angle hole drilling and precision bore finishing. Tool changes were reduced by standardizing hole diameters across the part, and cycle times plummeted due to higher achievable cutting speeds and feeds.
The total machining cycle time dropped by over 30%, which directly translated to a 23% reduction in overall CNC prototype cost for the client’s initial prototype run. Additionally, the optimized design eliminated the risk of tool breakage during deep pocketing, allowing us to shorten lead times and deliver the test-ready aluminum steering knuckles ahead of schedule.
Controlling your CNC prototyping budget ultimately comes down to making strategic trade-offs before the machining begins. As covered across this guide, every engineering choice, from replacing exotic alloys with high-machinability options to expanding internal pocket radii, sizing batch quantities to dilute fixed setups, and applying standard ISO 2768-m tolerances, directly impacts machine cycle time and final unit pricing. Applying these DFM principles gives your engineering team a better control over prototyping expenses without sacrificing the expected CNC prototype performance. Have a new component design ready for prototyping? Send us your drawings to receive a comprehensive DFM review and a transparent, itemized CNC quote.[2D Drawings (PDF files), 3D Drawings (IGS/STP/STEP files)].
 WhatsApp/WeChat/Mobile:
+86-15099911516
WhatsApp/WeChat/Mobile:
+86-15099911516 Tel: 86-150-9991-1516
 QQ: 939020977
 E-Mail: service@vimetal.com.cn


Why are CNC prototypes more expensive than 3D printed ones?
CNC machining requires higher setup fees, custom fixturing, dedicated CAM programming, and generates raw material waste, whereas 3D printing builds parts layer-by-layer directly from a file with minimal material loss and setup time.
Is 5-axis CNC machining always significantly more expensive than 3-axis?
Not always; while 5-axis machines have higher hourly operational rates, they can handle complex geometries in a single setup, which often saves money compared to making multiple custom fixtures for a 3-axis machine.
In what situations can splitting a part into multi-piece assemblies reduce CNC prototyping costs?
Splitting a part reduces costs when the original design contains deep internal pockets, hidden undercuts, or features that would otherwise require expensive 5-axis equipment, extreme tool lengths, or complex multi-angle repositioning.
What are the main rapid prototyping methods, and are CNC prototyping costs considered high among them?
The primary rapid prototyping methods include 3D printing, CNC machining, sheet metal fabrication, rapid injection molding, and vacuum casting; CNC prototyping costs rank on the higher end due to machine rate and material setup, but it delivers better structural strength and real production material properties.
CNC Aluminum Prototypes are popular, and do they offer a cost advantage compared to other CNC prototypes?
Yes, Aluminum (often the 6061 alloy ) is highly cost-effective because it is inexpensive as raw stock, easy to cut at high speeds with minimal tool wear, and usually cheaper to machine than hard metals like stainless steel or titanium. Therefore, CNC aluminum prototypes can be the cost-friendly choice for many industries like electronics, automotive, drones, bicycle, etc.
Are CNC prototyping costs higher for optical or aerospace applications compared to consumer products?
Yes, aerospace and optical prototypes cost substantially more because they demand ultra-tight tolerances, specialized CMM inspections, certified high-grade alloys, and stringent surface quality standards that require extended processing time and difficulty.
 Written By JunWen Liu
JunWen Liu holds a Mechanical Engineering degree from Esslingen University of Applied Sciences and spent seven years as a CNC Process Engineer, accumulating extensive hands-on experience. She now shares that knowledge through her writing, drawing from real problems she encountered on actual projects. Outside of work, she enjoys hiking and is always chasing the next summit view.

 Materials Used in CNC Prototyping: A Comprehensive Guide