Tolerance Press Fit: A Comprehensive Guide
When assembling mechanical parts, ensuring that each component fits together perfectly is critical. However, achieving the correct tolerance in press fit applications can be a challenge. If the tolerance is off, the parts may be too loose or too tight, leading to malfunction, wear, or even catastrophic failure. In manufacturing, a precise press fit tolerance means the difference between optimal performance and costly defects. Understanding these tolerances, and how to manage them effectively, is crucial.
Tolerance in press fit involves allowable deviations in the dimensions of mating parts to ensure reliable assembly. Achieving the right tolerance is essential for mechanical connections without compromising the integrity of the assembly.
To understand the complexities of press fit tolerance, we will explore various factors that influence it, how to measure it accurately, and the common challenges manufacturers face in press fit applications.
What is Tolerance in Press Fit?
Press fit tolerance refers to the permissible range of dimensional variation between two mating parts in an assembly, such as a shaft and hole, that allows for a secure, precise fit. The goal is to create a connection that’s either tight enough to prevent movement (interference fit) or loose enough to allow controlled motion (clearance fit).
Press fit tolerance ensures the proper functionality and durability of mechanical assemblies by aligning the dimensions of the parts with the intended design requirements. It is essential for achieving reliable joints without damaging components during assembly.
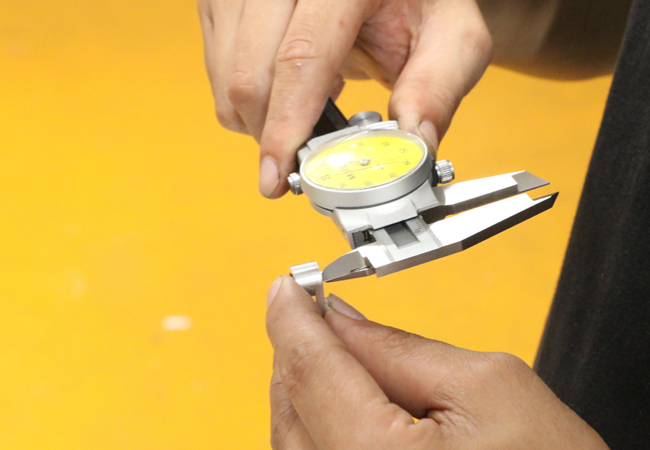
Types of Tolerances in Press Fit
In mechanical engineering, three primary types of fit tolerance are used in press fit applications. Each type serves a specific function, depending on the desired interaction between the mating parts. Understanding these types is crucial for selecting the appropriate fit for different assemblies, ensuring both performance and durability.
1. Interference Fit:
An interference fit occurs when one part is slightly larger than the other, creating a tight, pressurized bond when the parts are assembled. This type of fit ensures that the components stay securely in place, without the risk of slippage. It is commonly used for applications where a strong, permanent connection is required, such as in bearing press fits, dowel pin press fit hole sizes, and gear assemblies. Interference fits are often used in situations that involve high levels of pressure, mechanical stress, or vibration.
Applications:
Bearing press fits: To secure bearings in shafts or housings, preventing movement.
Dowel pins: Ensuring the pins stay fixed in place within drilled holes, preventing shifting or misalignment.
2. Clearance Fit:
In a clearance fit, the parts are intentionally designed with a gap between them, allowing for easy movement or sliding. This type of fit is used when parts need to move freely within an assembly, such as in rotating components or where less force is needed for assembly. Clearance fits are less tight and offer minimal resistance, which is ideal for applications like bushings, shafts, or where precision alignment is not critical.
Applications:
Sliding fits: Allowing shafts or pins to move freely in their respective holes.
Rotating parts: These parts need to rotate without significant friction or resistance, such as in some motor assemblies or drive systems.
3. Transition Fit:
A transition fit lies between the interference and clearance fits, offering a balance where the parts can either be loosely or tightly connected depending on the tolerances. This type of fit is often used when a precise but flexible fit is needed, where the assembly could either be tight enough to prevent unintended movement or loose enough to allow for easier assembly. Transition fits are often used in applications where a moderate level of force is required to assemble the parts, but without the risk of permanent distortion.
Applications:
Machine components: These parts may need to stay in place but still be disassembled or adjusted during maintenance.
Shafts and bearings: To provide a compromise between ease of assembly and secure positioning.
Interference Fit vs Clearance Fit: What’s the Difference and When to Use Each?
Interference fit creates a tight, pressurized connection where one part is slightly larger than the other, ensuring a secure, permanent bond. It’s ideal for applications that require a strong, immovable connection, such as bearing press fits or dowel pins.
In contrast, a clearance fit allows parts to fit together with a slight gap, enabling smooth movement or sliding. This is used in assemblies where free motion is necessary, like rotating shafts or sliding components. Choose interference fit when you need a strong, fixed connection, and clearance fit for parts that need to move freely.
What Factors Influence Press Fit Tolerance?
Several factors influence the precision of press fit tolerances, including:
Material Properties: Different materials respond uniquely under stress or temperature fluctuations. For example, metals like steel may expand more than plastic during heating, impacting the press fit’s stability. Plastic bush calculators help predict how plastic components will behave, while interference fit calculators are used for metals, ensuring precise calculations.
Surface Finish: A smooth surface finish minimizes friction during the press fit process, allowing tighter fits. Machining tolerances and finishes play a significant role in achieving the desired accuracy.
Temperature Variations: Temperature-induced changes, such as thermal expansion or contraction, can affect press fits. For instance, resizing plastic holes with thermal steel shafts highlights how temperature compensation ensures correct fitment under varying conditions.
Design Standards: Utilizing established tolerance fit charts, such as the ISO fits chart, ensures the proper alignment of components, reducing variations and maintaining consistency across different assemblies.
How to Measure and Calculate Press Fit Tolerances?
1. Fit Tolerance Charts:
Standardized charts, such as the hole and shaft tolerance chart, are essential in the press fit process. They help engineers determine the correct fit between mating components by specifying the allowable dimensional variations for both holes and shafts, ensuring they will assemble properly.
2. Tools and Machines:
- Coordinate Measuring Machines (CMMs): These provide exceptional precision for measuring the physical dimensions of components. CMMs are essential for ensuring that parts meet exact specifications, which is crucial for achieving the desired press fit tolerance.
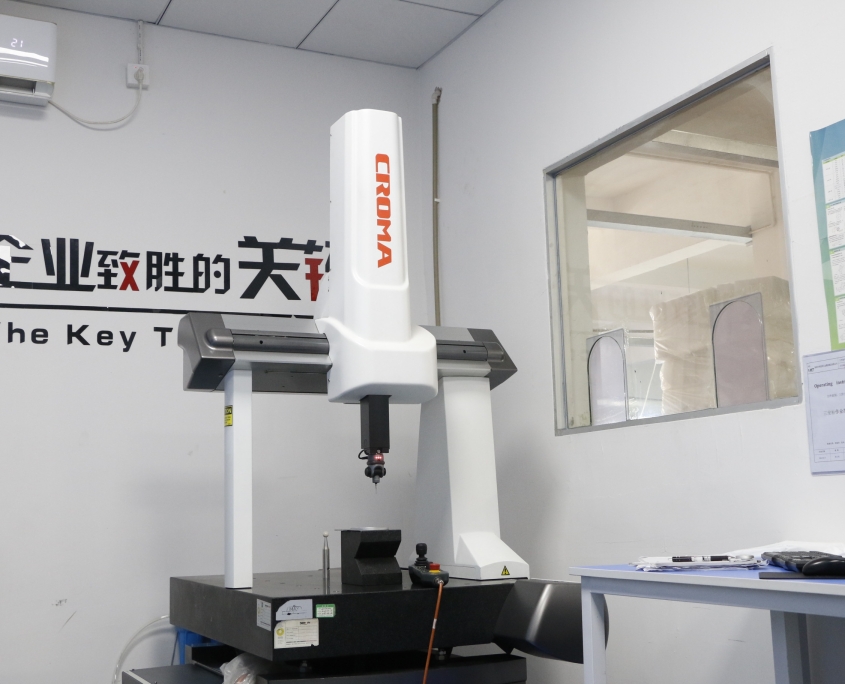
- Dowel Pin Press Fit Hole Size Charts: These charts provide specific measurements for dowel pins and their corresponding hole sizes. For bearing press fits, ensuring the correct dowel pin fit size is critical for maintaining the strength and integrity of the assembly.
- Press Fit Calculators: These software tools help engineers calculate the optimal interference or clearance between parts based on material properties, temperature conditions, and other factors. They ensure that the press fit will hold securely without causing damage or failure.
3. Tolerance Analysis:
Incorporating tolerance stack-up analysis is crucial, especially for complex assemblies. This analysis examines the combined effect of tolerances from multiple components to predict how these small variations can affect the overall fit and functionality of the final product. Tolerance stack-up ensures that the assembly process will run smoothly and prevents parts from not fitting together properly, potentially causing failures or increased assembly time. Additionally, by using 3D modeling software, engineers can simulate how different tolerances will affect the assembly, which aids in further refining the design.
Press Fit Tolerance in CNC Machining
Press fit tolerance in CNC machining requires exceptional precision to achieve secure and reliable connections. Modern CNC machines excel at delivering tight press fit tolerances, thanks to their ability to control dimensions within microns. However, challenges such as material deformation, thermal expansion, and tool wear can impact accuracy. Overcoming these requires proper machine calibration, material selection, and tool maintenance.
Employing advanced techniques like 5-axis machining, custom fixture setups, and in-process inspection ensures high-precision results. These capabilities make CNC machining an ideal solution for manufacturing components with demanding press-fit requirements across industries.
How to Avoid Common Press Fit Challenges?
While achieving perfect press fit tolerances can be difficult, there are strategies to minimize these challenges:
1. Ensure Accurate Measurements:
To avoid measurement inaccuracies, invest in high-precision tools such as Coordinate Measuring Machines (CMMs) or specialized press fit calculators. Regularly calibrate measurement tools and use advanced systems like optical measurement devices to verify tolerances at every stage of the manufacturing process.
2. Select Compatible Materials:
Material compatibility is essential. Conduct a thorough analysis of materials’ thermal and mechanical properties, considering factors like thermal expansion and hardness. Use tools such as plastic bush calculators for plastics and reference bearing press fit tolerance charts for metals to select materials that will perform well under pressure.
3. Account for Environmental Factors:
To mitigate the impact of environmental variations such as temperature changes, use materials with low thermal expansion and consider designing assemblies with built-in allowances for temperature fluctuations. In addition, use temperature compensation techniques during the design and assembly stages.
4. Regular Tooling and Machine Calibration:
Ensure that press fit machines and tooling are regularly inspected and calibrated. Investing in high-quality, durable tools will minimize wear and misalignment. Periodic machine maintenance can ensure that the tools remain in optimal working condition, preventing misalignments that can affect the fit.
5. Perform Comprehensive Tolerance Analysis:
Implement a thorough tolerance stack-up analysis early in the design phase. This allows engineers to identify and resolve potential issues before they become problems during assembly. Using tolerance fitting tables and simulating press fits with 3D modeling software can help ensure a precise assembly with minimal interference or clearance errors.
By taking these proactive steps, you can overcome many of the common challenges associated with press fit applications, leading to more reliable and efficient production processes.
How to Choose the Right Press Fit Tolerance?
Choosing the right press fit tolerance is essential to ensure proper performance, longevity, and functionality of the assembly. When making this decision, consider the following factors:
1. Application Requirements:
The intended application plays a significant role in determining the appropriate press fit tolerance. High-performance, safety-critical applications like aerospace, automotive, or medical devices often require tighter interference fits to withstand high stresses and maintain structural integrity. In contrast, less demanding applications, such as general consumer products, may only require clearance fits that allow for free movement and easier assembly.
2. Material Compatibility:
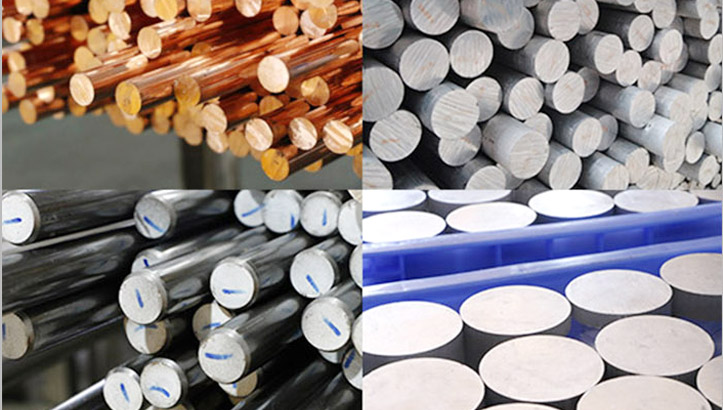
The materials used in the press fit assembly must be compatible with each other under pressure, temperature changes, and environmental conditions. Steel, aluminum, and plastics all have different thermal expansion rates and hardness. Use fit tables and fit charts, such as the hole and shaft tolerance chart or bearing fit charts, to select the right combination of materials and tolerances. Tools like the plastic bush calculator can help predict the performance of press fits in plastic applications.
3. Load and Stress Factors:
For assemblies exposed to high operational loads or frequent mechanical stress, such as bearings or press fit pins, the press fit tolerance needs to ensure a firm, secure connection. In these cases, calculating the tolerance interference fit is crucial to prevent the parts from loosening or shifting during use. Consider the load-bearing capacity of each component and select the appropriate fit to minimize deformation and ensure the assembly remains secure under pressure.
4. Environmental Conditions:
Consider external factors such as temperature variations, humidity, and vibration that could affect the fit. Parts exposed to extreme temperature fluctuations, for example, may require a transition fit or carefully selected materials to account for thermal expansion or contraction. Ensure that the fit design allows the assembly to maintain performance under varying environmental conditions.
5. Manufacturing and Assembly Process:
The ease of assembly and the required level of precision can also impact your choice of press fit tolerance. Tight interference fits may require specialized machinery, such as press fit machines or hydraulic presses, to ensure proper assembly. Ensure that your manufacturing process is capable of consistently achieving the required tolerances without excessive wear or variation in results.
How Does Temperature Affect Press Fit Tolerances?
Temperature plays a critical role in press fit tolerances, as materials expand or contract with changes in temperature. This thermal behavior can significantly influence the performance and reliability of press-fit assemblies.
Key Effects of Temperature on Press Fit
- Thermal Expansion and Contraction
- Metals: Tend to expand when heated and contract when cooled. Excessive heat can loosen interference fits, while extreme cold can make assembly difficult by increasing interference.
- Plastics: Exhibit higher thermal expansion rates than metals and can deform under heat. Precision tools, like a plastic bush calculator, help predict tolerances accurately for these materials.
- Differential Expansion
- When two mating parts are made of materials with different thermal expansion coefficients, their dimensions may shift unevenly with temperature changes, leading to:
- Reduced interference: When the shaft expands more than the hole.
- Increased interference: When the hole contracts more than the shaft.
- When two mating parts are made of materials with different thermal expansion coefficients, their dimensions may shift unevenly with temperature changes, leading to:
- Stress AccumulationSudden temperature changes or mismatched expansion rates can introduce internal stresses, potentially damaging parts or compromising the fit’s integrity.
Tools for Achieving Precise Press Fits
Ensuring accuracy in press fits requires specialized tools and resources designed to calculate, measure, and predict the performance of mating components. Below are the most commonly used tools and their applications:
1. Hole-Shaft Tolerance Calculators
Hole-shaft tolerance calculators are essential for determining the exact dimensions needed for mating parts to achieve a desired fit type, such as interference or clearance. These tools use standardized equations and inputs like material properties and operational conditions to recommend tolerances. They are widely used in designing precision components like gears and bushings, ensuring optimal performance and compatibility.
2. Tolerance Fit Charts
Tolerance fit charts provide standardized tables that outline permissible dimensional variations for different fit types. These charts, based on standards like ISO 286 or ANSI B4.1, are invaluable for quickly referencing tolerance grades and ensuring compliance with industry specifications. They simplify the selection process for shafts and holes during the design phase.
3. Press Fit Force Calculators
Press fit force calculators estimate the amount of force required to assemble or disassemble a press fit. These tools consider factors like material hardness, fit dimensions, and surface conditions to ensure the assembly process is efficient and damage-free. They are particularly useful for selecting appropriate tools, such as hydraulic or mechanical presses.
4. Finite Element Analysis (FEA) Software
Finite Element Analysis (FEA) software simulates the mechanical behavior of press-fit connections under various conditions, such as thermal expansion or applied loads. By providing detailed stress and deformation analysis, FEA helps engineers optimize designs before physical production, reducing the risk of failure in critical applications like aerospace or medical devices.
5. 3D Measuring Equipment
Tools like Coordinate Measuring Machines (CMMs) and laser scanners are used to verify the precise dimensions of shafts, holes, and assembled parts. These devices ensure compliance with design specifications by providing accurate measurements, often at micron levels, making them indispensable for quality control in high-precision manufacturing.
Key Examples and Applications of Press Fits
Press fits are widely utilized in various industries, ensuring secure, precise connections across numerous applications. Here are key examples and their industrial significance:
Key Examples of Press Fit Applications
1. Bearing Press Fits
Bearings are critical components in rotating machinery, and achieving a proper press fit ensures their reliability. Engineers rely on precise bearing press fit tolerance charts to calculate dimensions that guarantee secure seating, prevent rotation, and withstand operational stresses.
2. 3D Printing Tolerances
In 3D printing, press fits are commonly used for assembling components. Applications like 3D print tolerance for tight fits require fine-tuned tolerances, accounting for material properties, printer accuracy, and post-processing effects, to ensure a balance between ease of assembly and durability.
3. Machining Press Assemblies
Machined components such as bushings, dowel pins, and gears often use press fits to maintain alignment and structural integrity. Fit tolerance charts are employed to ensure machined parts achieve the precise dimensions needed for reliable assembly.
Applications of Press Fit in Different Industries
1. Automotive Industry
Press fits are integral to automotive systems for assembling components like bearings, bushings, gears, and wheel hubs. These connections ensure durability and resistance to vibrations and operational loads, contributing to vehicle safety and performance.
2. Aerospace
In aerospace, press fits are used for critical components such as turbine shafts, structural fasteners, and engine assemblies. Here, precision is paramount as any failure can result in catastrophic consequences. Proper tolerance in press fits ensures that joints withstand extreme temperatures, pressures, and dynamic forces.
3. Medical Devices
Press fits play a vital role in medical equipment, including surgical tools, implants, and diagnostic devices. These applications require precise fits to maintain sterility, functionality, and safety, particularly in high-stakes environments where reliability is non-negotiable.
4. Electronics & Industrial Equipment
In electronics, press fits are used for connectors, circuit board assemblies, and housings. For industrial equipment, press fits secure precision components like shafts, couplings, and actuators. These applications demand tight tolerances to prevent wear, maintain alignment, and ensure long-term performance.
Professional Services for Tolerance Press Fit
To accurately set press fit tolerances, it is critical to consider a variety of factors. If you need professional help in determining the optimal press fit tolerance, VMT is a trustworthy choice.
VMT is a professional CNC machine shop with IATF16949 and ISO9001 quality management system certification. We provide a variety of manufacturing services including tolerance engineering, CNC precision machining, sheet metal processing and 3D printing. Our technical team consists of 6 experienced process optimization experts with an average of 20 years of industry experience.
Now, you can submit your CAD file immediately and we will provide you with an instant free quote service!

In Conclusion
Frequently Asked Questions
How Much Tolerance for Press Fit?
Press fit tolerances typically range from 0.001 to 0.005 inches (0.025 to 0.127 mm) depending on the material, size, and application. Precision is key to ensuring a secure yet achievable fit.
What is a Good Press Fit Tolerance?
A good press fit tolerance ensures a tight hold without damaging components. For most applications, a tolerance of 0.001–0.002 inches (0.025–0.051 mm) per inch of shaft diameter works well. Adjust based on material properties.
How Tight Should a Bearing Press Fit Be?
A bearing press fit should have an interference fit typically ranging from 0.0005 to 0.0015 inches (0.013 to 0.038 mm) for small bearings. For larger bearings, consult manufacturer guidelines to prevent deformation.
What is The Rule of Thumb for a Press Fit?
The general rule of thumb is 0.001 inches of interference per inch of diameter. Adjust based on material strength and thermal expansion properties for optimal results.

